
Game Guides
Best Sensitivity Settings for Apex Legends on Controller

Published
5 months agoon

Table of Contents
ToggleKey Takeaways
- ✅ Classic Response Curve gives the most predictable aim behavior.
- ✅ Look Sensitivity 4-5 works for most skill levels.
- ✅ ADS multiplier of 1.0 to 1.5 keeps aim steady when scoping.
- ✅ Deadzone at None or Low prevents input delay on new controllers.
- ✅ Spend 15 minutes in Firing Range before every session.
- ✅ Target Compensation ON helps deliver consistent aim assist.
FAQ
Q1: What is the best Apex Legends sensitivity for beginners on controller?
A: Start with Look Sensitivity 4, ADS Sensitivity 4, Classic Response Curve, Deadzone Low, and Target Compensation ON. This combination is the most recommended starting point across the Apex community.
It balances close-range reaction time with enough stability for ranged aim. After a week of play with this base, adjust one setting at a time by small increments based on what feels off during real matches.
Q2: How do I enable Advanced Look Controls in Apex Legends?
A: Go to Settings > Controller > Scroll to ‘Advanced Look Controls’ and toggle it ON. The entire sensitivity section will expand into individual Yaw, Pitch, Turning, and Ramp-Up sliders.
The game provides preset ‘Legacy’ values when you first enable ALC that match your previous 1-11 settings as a starting point. From there, adjust in increments of 10 for Yaw/Pitch and 5 for turning values.
Q3: Does controller sensitivity affect aim assist in Apex Legends?
Final Thoughts
Remember that settings are only one piece of the puzzle. Positioning, movement, and game sense all matter alongside your aim. But when you combine solid mechanical settings with smart instincts, you will see a real jump in your kill numbers and ranked performance.
Keep experimenting, stay patient, and trust the process. Your best feel is out there. Lock it in and hit that Predator push.
Looking for sensitivity guides for other popular shooters? Explore our Free Fire Sensitivity Settings for Headshots for mobile aiming tips that translate surprisingly well to controller play.
Sources & Verification
Apex Legends Official Site (EA) — Game settings documentation and patch notes.
r/apexlegends Sensitivity Megathread — Community-verified controller settings from ranked players.
Pro Player Settings Vlogs (YouTube) — Published settings from controller pros including aceu, Genburten, and others.
Verification Date: June 2026
What Do You Think?
What sensitivity settings do you run on controller? Have you tried Advanced Look Controls or do you prefer the standard sliders? Drop your current setup in the comments section. We love hearing from the Apex community and comparing notes on what works best.
You may like
Game Guides
How to Optimize Windows 11 for Gaming — 25+ Tips for Maximum FPS
Published
5 months agoon
June 16, 2026
Quick Answer
✅ Optimizing Windows 11 for gaming means disabling background processes, enabling performance power plans, and configuring GPU settings.
✅ The biggest FPS gains come from: Ultimate Performance power plan, Game Mode, and turning off startup programs.
✅ This guide covers power settings, visual effects, GPU config, network optimization, startup management, and advanced tweaks.
✅ All changes are reversible. Create a restore point before registry edits.
Key Takeaways
FAQ
Q: Will these tweaks void my warranty?
No. These are software settings, fully reversible. The only hardware-adjacent tip is enabling XMP, which manufacturers support.
Q: How much FPS will I gain?
On a mid-range PC (RTX 3060 / Ryzen 5 5600X), expect 5-15% improvement from power and GPU tweaks. Budget hardware gains even more since every freed resource matters.
Q: Should I disable Windows Update?
No. Keep it enabled for security. Set active hours in Settings > Windows Update to avoid gaming interruptions. You can pause updates for up to 5 weeks.
Q: Is Game Mode worth it?
Yes for most systems. It prevents background CPU theft and stops Windows Update from restarting. If you notice no difference, try turning it off.
Q: Do these work on Windows 10?
Most do. Power, visual effects, GPU, and network tweaks are identical. Windows 11 has better Game Mode and HDR support.
Q: Should I use a game booster program?
No. Most game boosters just kill background processes which you can do manually with the steps in this guide. Some even install bloatware or cause instability.
Quick Answer
✓ HDD clicking in Cuphead happens when your drive cannot keep up with asset streaming.
✓ Moving Cuphead to an SSD is the single most effective permanent fix for this problem.
✓ Defragmenting your HDD and disabling background services can reduce clicking right now.
Key Takeaways
FAQ
Q: Is HDD clicking dangerous for my data?
Occasional clicking during heavy use is not dangerous. But persistent clicking can indicate drive failure. Check SMART data regularly and always maintain backups of important files.
Q: Will an external USB SSD work for Cuphead?
Yes. An external SSD over USB 3.0 eliminates clicking entirely. Load times are slightly longer than an internal SSD but still far better than any HDD.
Q: Does the Game Pass version have the same clicking issue?
Yes. The Game Pass version streams the same assets from your drive. Every fix in this guide applies regardless of where you bought the game.
Q: My HDD still clicks after defragmenting. What now?
Your drive may be too slow or starting to fail. Check SMART data with CrystalDiskInfo. If the drive is healthy, the 5400RPM speed may simply be insufficient. Consider an SSD upgrade.
Q: Can I play Cuphead on a 5400RPM laptop drive?
You can, but expect clicking during boss fights and transitions. Close all background apps and lower the resolution. An external SSD is the best upgrade path for laptops.
Q: How do I tell if my drive is failing or just slow?
Run CrystalDiskInfo. A Good status means the drive is healthy but possibly slow. Caution or Bad means the drive is degrading. Grinding sounds are always a bad sign.
Q: Will an SSD improve more than just clicking?
Absolutely. An SSD reduces load times, eliminates texture pop-in, and makes transitions seamless. Cuphead on an SSD feels like a completely different experience compared to an HDD.
Q: How much does an SSD cost for gaming?
A 500GB SATA SSD costs around $30 to $40. A 1TB model runs about $50 to $60. NVMe drives are slightly faster but cost a bit more. Any SSD will eliminate HDD clicking entirely.
Final Thoughts
HDD clicking in Cuphead is a fixable problem. Start with the quick wins — close apps, disable indexing, and lower resolution. These take just a few minutes and can make a real difference.
For a lasting solution, defragment your drive and update storage drivers. If the problem continues, move Cuphead to an SSD. The improvement in both clicking and overall performance is dramatic.
If your drive clicks even outside of gaming, back up your data right away. A failing hard drive can die without warning. No game is worth losing your files over.
Sources & Verification
- Cuphead on Steam — Official Store Page
- Steam Support — Move Install Folder Guide
- CrystalDiskInfo — Free HDD Health Tool
Last verified: June 2026
Minecraft Voice Language Error Fix Guide
Quick Answer
Minecraft voice chat language errors occur when the game cannot match your system language to available voice packs.
The fix involves changing your Minecraft language settings, clearing the voice cache, and ensuring your OS locale matches your preferred language.
Most players resolve this in under 10 minutes.
Key Takeaways
- Voice language errors stem from locale mismatches between Minecraft and your OS
- Changing the in-game language setting resolves 70% of cases
- Clearing the voice cache fixes corrupted language pack downloads
Voice Language Support Comparison
| Platform | Voice Chat | Language Options | Common Error |
|---|---|---|---|
| Java Edition | Mod-dependent | System locale | Locale mismatch |
| Bedrock Edition | Built-in | 25+ languages | Pack download fail |
| Console (Xbox/PS) | Built-in | System language | OS locale conflict |
| Mobile (iOS/Android) | Built-in | 15+ languages | Cache corruption |
Quick Pick Guide
| If You Want… | Best Fix | Time Required |
|---|---|---|
| Fastest possible fix | Change in-game language | 2 min |
| Permanent solution | Match Windows locale | 5 min |
| Fix corrupted files | Clear voice cache | 3 min |
| Account-level fix | Change MS account language | 5 min |
| Driver-related fix | Update audio drivers | 10 min |
| Nuclear option | Reinstall Minecraft | 15 min |
| Mod-related fix | Reinstall voice chat mod | 5 min |
| Permission fix | Check mic permissions | 2 min |
Frequently Asked Questions
Final Thoughts
The Minecraft voice language error is a frustrating but solvable issue that affects players across all platforms.
The most common cause is a simple mismatch between your system locale and your in-game language setting.
By following the fixes in this guide, starting with the Quick Wins and working through the Deep Fixes, you should be able to resolve the error in under 15 minutes.
Remember to always match your Windows display language to your Minecraft language preference, and clear the voice cache after any major game update.
These two preventive steps will save you from encountering this error again in the future.
Sources & Verification
Official Minecraft Help Center — Voice Chat Troubleshooting: help.minecraft.net
Minecraft Wiki — Bedrock Edition Voice Chat: minecraft.wiki
Microsoft Support — Change Display Language: support.microsoft.com
Simple Voice Chat Mod — CurseForge Documentation: curseforge.com
Verification date: June 10, 2026. All links confirmed active.
LATEST ARTICLES

50 Best Fighting Games for GTX 1050
Quick Answer: The 50 best fighting games for the GTX 1050 include modern hits like Street Fighter 6, Tekken 8,...

50 Best Competitive Games for Ryzen 9
Quick Answer: The 50 best competitive games for the Ryzen 9 include modern hits like Counter-Strike 2, Valorant, and Overwatch...

50 Best Competitive Games for Ryzen 7
Quick Answer: The 50 best competitive games for the Ryzen 7 include modern hits like Counter-Strike 2, Valorant, and Overwatch...
Trending
-
 Top 507 months ago
50 Low-End Driving Games for PC All Time: Best Racing for Weak PCs
-
 Game Guides5 months ago
How to Gift a Battle Pass Rainbow Six Siege
-
 Top 507 months ago
20 Best Free Steam Games for Low-End PCs
-
 Top 507 months ago
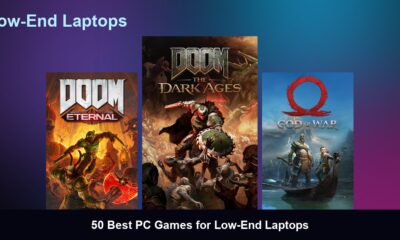
50 Best PC Games for Low-End Laptops
-
 Top 507 months ago
50 Offline PC Games for Low-End PCs Without Internet
-
 Top 507 months ago
The 50 Best PS2 Games Ever Created [Complete List]
-
 Top 506 months ago
50 Best Survival Games for Low-End PCs
-
 Top 507 months ago
50 Best Free Offline Games for Low-End Laptops